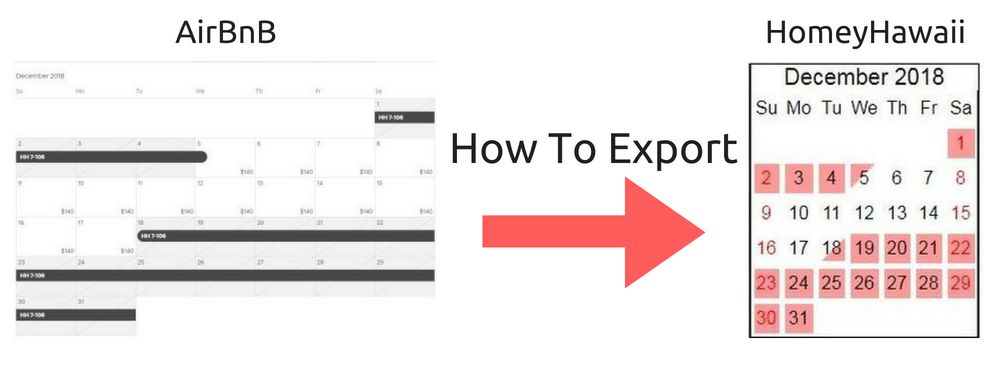
How To Export Airbnb Calendar – Explained Step-by-Step
Last updated September 1, 2019. While this article is written for Airbnb hosts who need to export Airbnb calendar into their HomeyHawaii listing, this information is useful to any Airbnb host who needs to sync Airbnb calendar with any other platform, supporting iCalendar format.
If you are a vacation rental owner, travelers are your best customers! And you want to take a really good care of them from the get-go. Travelers crave to know accurate availability, so let’s dig into how to find that export calendar link on Airbnb and how to import it into another platform to synchronize.
Our How to Export Airbnb Calendar tutorial has 8 simple steps. Steps 1 through 4 explain exactly how to find and copy the Airbnb calendar Export link. Those are exactly the same steps, regardless of the platform you need to synchronize your Airbnb calendar with. Steps 5 through 8 explain how to import this Airbnb calendar link into your HomeyHawaii listing. You can easily adapt them to any other portal you are using.
Step 1. Select your Airbnb listing
Log into your Airbnb account. If you have multiple listings, make sure to select the correct listing, from which you want to export calendar. In the image below, I will click the underlined title to select that listing.
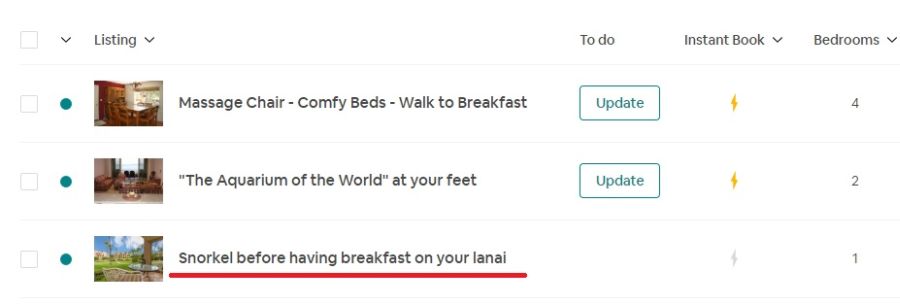
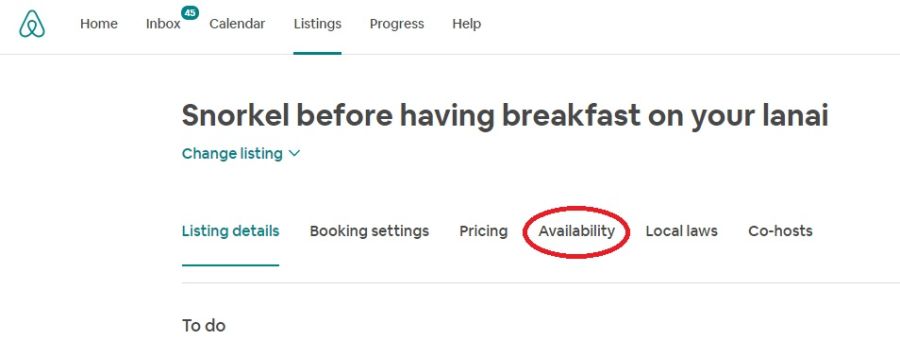
Step 2. Click Availability link
Locate the Availability link in the menu and click on it.
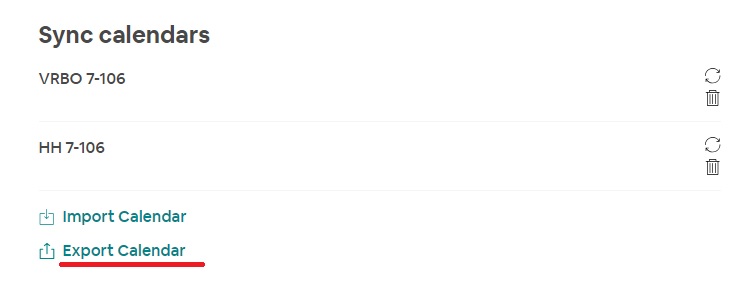
Step 3. Click Export Calendar
Scroll down closer to the bottom of the Availability page, until you see Sync Calendars section. Click on Export Calendar.
Step 4. Select and copy the export link
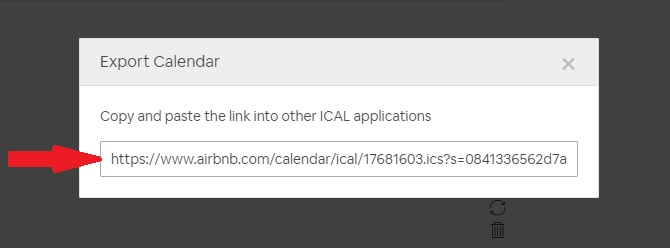
When the Export Calendar dialog opens, hold you mouse over the start of the link, click, hold and drag until all the link is selected. Then right-click on the selected link and choose Copy. You Export Airbnb Calendar link will look like this:
https://www.airbnb.com/calendar/ical/17681602.ics?s=0841336562d7ab47aedb088571990c82
Step 5. Go to your HomeyHawaii listing to add an external calendar
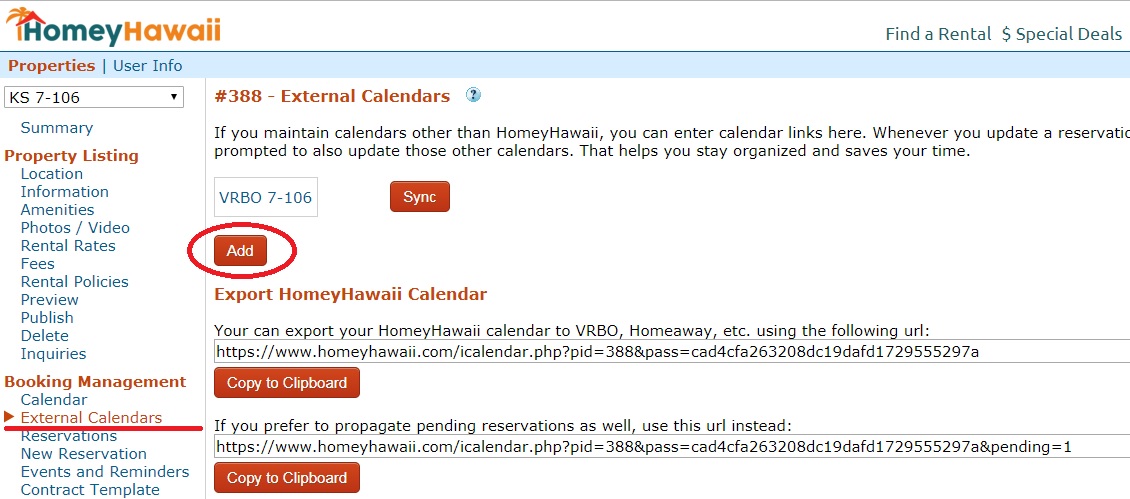
Login into your HomeyHawaii owner account, and choose your correct listing. Click External Calendars link on the left, and then click Add button to create the new calendar, which will receive the reservation data from your Airbnb calendar.
Step 6. Enter data and save the external calendar
Name the calendar (I called it Airbnb 7-106), paste the Airbnb export calendar link you’ve copied in Step 4 into Sync URL field, and click Save.

Step 7. Manually run the first Export Airbnb Calendar
At this point you are asked to manually synchronize calendars the first time. This is done to ensure that you copied the export calendar link correctly. Just click the Sync button.

Step 8. Final verification
Verify that the first calendar export was successful. From now on the synchronization will run automatically every hour. You can also click on the Calendar link on the left to view how your HomeyHawaii calendar looks and compare it to your Airbnb calendar.


One thought on “How To Export Airbnb Calendar – Explained Step-by-Step”